Tuesday, October 12, 2010

The Selfish Giant- Illustrated

I received a lot of interest in this watercolor illustration after posting it over 2 years ago (I painted it almost 6 years ago!).  Since viewers seem to like it, I thought I would post all 3 illustrations I designed along with the appropriate excerpt from Oscar Wilde's story in sequence below.

Note: There seems to be a little Homer Simpson in my character design.

In The Garden:
The Selfish Giant finds children playing in his garden.

"'What are you doing here?' he cried in a very gruff voice, and the children ran away.
'My own garden is my own garden,' said the Giant; 'any one can understand that, and I will allow nobody to play in it but myself.' So he built a high wall all round it, and put up a notice-board."

TRESPASSERS
WILL BE
PROSECUTED


Winter Comes:
Characters: Snow, Frost, Hail and The North Wind from The Selfish Giant

"Only in the garden of the Selfish Giant it was still winter. The birds did not care to sing in it as there were no children, and the trees forgot to blossom. Once a beautiful flower put its head out from the grass, but when it saw the notice-board it was so sorry for the children that it slipped back into the ground again, and went off to sleep. The only people who were pleased were the Snow and the Frost. "Spring has forgotten this garden," they cried, "so we will live here all the year round." The Snow covered up the grass with her great white cloak, and the Frost painted all the trees silver. Then they invited the North Wind to stay with them, and he came. He was wrapped in furs, and he roared all day about the garden, and blew the chimney-pots down. "This is a delightful spot," he said, "we must ask the Hail on a visit." So the Hail came. Every day for three hours he rattled on the roof of the castle till he broke most of the slates, and then he ran round and round the garden as fast as he could go. He was dressed in grey, and his breath was like ice."

The Death of the Selfish Giant:

A good life.


"And the child smiled on the Giant, and said to him, "You let me play once in your garden, to-day you shall come with me to my garden, which is Paradise."

"And when the children ran in that afternoon, they found the Giant lying dead under the tree, all covered with white blossoms."

------------------------------
Read the entire short story of The Selfish Giant
View more of my artwork at: www.spencerhallam.com

Sunday, October 10, 2010

Expressive Chroma: Gangster Judo Shake Down!


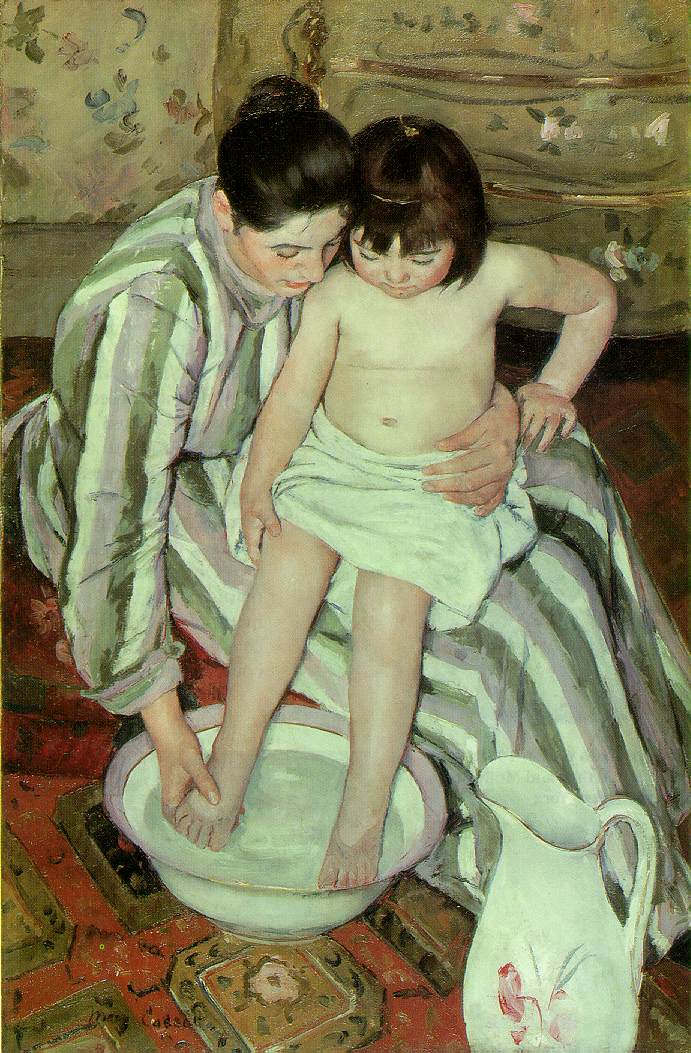
The digitally colored drawing above was primarily an exercise to study wrinkles in clothing and foreshortened/overlapping anatomy.  You'll notice very little value value rendering of form.  Instead I've chosen to use grays and browns throughout most of the image and then use high chroma flesh tones to call focus to the grappling characters. It's one way to limit the palette for expressive effect.

Mary Cassatt made a lot of beautiful work with great sensitivity to chroma and a lot more subtlety than myself (image from Wikipedia's article on Cassatt):


-----------------------------------
Don't forget to visit my portfolio:  www.spencerhallam.com


Thursday, October 7, 2010

How to Use Color Intensity: 3 Digital Studies

Here are 3 rough photoshop studies I completed with my little Wacom Tablet that demonstrate some of the color chroma concepts I wrote about earlier this week. They really show clear color gradations. I hoped this might apply the idea creatively and also be a little more interesting than the cubes. 


The first (just below) was a study I referenced and caricatured from a Dean Cornwall painting that was posted over at the Gurney Journey.  I loved the color and key of the painting so much, I had to investigate.  You can see the bleaching effect best in his white shirt sleeves where the shadows have more chroma than the light side. More subtly you can see where his beard is slightly more brown in the mid-tone before the light's begin.


In the digital study of the face above is lit from above by low red-orange light. For the lightest lights I used the most saturated orange I could find.  In the two brightest highlights (in the nose and top of the head) I added white to lighten them further so they would punctuate the form stand out beyond the rest.


In this last invented face and lighting scheme, you can see the flesh tone graying toward the dark side and intensifying toward an orange in the light side.  The man's shirt goes through the same gradation.

-------------------------------------
View my portfolio at: www.spencerhallam.com

Wednesday, October 6, 2010

Breaking through Color Rules

What's this thing? Read on to find out!

It can be difficult to improve at realistic color when good (but incomplete) rules of thumb are repeated over and over like mantras as though hearing them again will make one understand something new.  Since I find this troublesome  I wanted to talk about a couple of rules I hear over and over and attempt to provide a deeper description that might help get a painter past some of the more cliched rules that teachers and introductory books often dwell on.  Here goes . . .

GOOD RULE: The light side and the dark side of an object have opposing color temperatures:
I often hear the common rule of thumb when rendering form in color essentially it states that warm light will cast cool shadows and that cool light will cast warm shadows (see earlier cube study).   This generally seems like a good rule, but I have always felt that this rule often becomes confusing when considering the appropriate chroma (or saturation) of a chosen color plane.

CRITICISM: Much confusion can occur when local color transitions toward the shadow side of a form and thereby loses saturation. Since more neutralized shadow color is usually going to be more cool than the local color, then the relative saturation can confuse the above rule about color temperature.

How about this blue cup placed in the cool light of a window? Are the shadows here clearly warmer?

Is this shadow warm?

 Another downside to this rule is that it causes a novice painter to immediately mix in orange into the lights and blue into the shadows.  Though, this is a start, it will often result in very exaggerated, acidic color.

Lastly, light can be balanced and therefore neither warm nor cool.  Bright cloudy days can be like this.  How do we deal with relative temperature then?

GOOD RULE:  Color is more intense on the light side of an object
Many times this is repeated as "color obtains the light" (which sounds like it was first said by some one in a big floppy beret and moo moo-like painting smock).  If that were absolutely true then the more light on an object then the more color saturated it would be.  Maybe this is true in physics but the receptors in our eyes have limits and bleaching of the light occurs.

CRITICISM: Most painters discover this problem when they mix their light side colors.  If the light source is warm then as the object becomes lighter it should increasingly adopt the warmth of the light. However, when mixing paint an artist runs out of bright (saturated) colors that are also light in value and must mix in white to lighten, which ends up cooling off (by neutralizing) the highlights.

So how can we conceptualize the gradating colors on an object from it's shadow side through the mid-tone and ending on the highlight?  Does color really "obtain" the light? Do warm lights cast cool shadows and vice-versa?  These are good basic rules, but I've been thinking of another one to help out.  This rule should tell us which part of an object gets the most saturated version of the local color?

Here's what I've come up with:

SUGGESTED RULE: Chroma is highest between the effects of bleaching and shadow.
Local color achieves it's highest chroma when sandwiched between areas of intense bleaching intense light, and the beginning of the shadow side when there is little reflected light.  This rule seems to hold true in a variety of circumstances.  See the cubes I've made below to see what I mean.

 Which plane of each cube above has the greatest chroma?

  • The highlight has greatest saturation in low light/low key environments (like candlelight) since there is no bleaching effect
  • The mid-tone is the most saturated at medium light levels when the local colors the light side begins to bleach yet there's not so much light as to reflect very much of it back into the shadows (like in a well lit room or on an overcast day.
  • The shadow side however becomes the most saturated when the light source is so bright that even the mid-tone begins to bleach and enough light begins to reflect back into the shadow side to fully illuminate it (like on a bright cloudless summer day).
The planes on the cubes with the highest chroma are indicated.
What do you think?  Can this be true? I can't be the first one to have looked at this as a rule.

Please leave a comment and let me know if you'd like to add to this topic or can link to a similar discussion of this topic elsewhere on the internet.

------------------------------------

view my portfolio: www.spencerhallam.com


Wednesday, September 29, 2010

Sketch Night at the Society of Illustrators NYC


This Tuesday I attended a figure drawing session at the Society of Illustrators in New York.  The inexpensive class has 2 live models, live music, and a full bar decorated by a large Norman Rockwell painting.  It's a pretty amazing venue, especially for a drawing class.

Here are some of the sketches of 5 to 20 minute poses using a ink brush/marker.  I really enjoyed the dry brush effect when it worked in my favor.  I posted the image below so you can see the texture close up.


---------------------------------------------

View my portfolio at: www.spencerhallam.com

How to Create Color Harmony


This is a follow up post to color game I posted earlier.  I wanted to show how to see and create the illusion of different colored light.  This illusion is particularly notable when looking at objects whose local color is the compliment, or opposite hue, of the light source. I've also given both images the same neutral background color to make comparisons more easy.

As with the previous post  the top 4 cubes are in warm (orange) light, while the bottom 4 cubes are in cool (bluish) light.  Both rows are depicting cubes of the same color (white, blue, orange, and black).

Notice that the color saturation (also called intensity or chroma) of the blue cube is more intense when the light source is of the same hue while the blue looks more neutralized and gray under a complimentary light source.  You can see the same phenomena occur by comparing the orange cube on the top with the orange cube on the bottom.

* an advanced note, I originally created this post  for my own purposes so I ended up using paint mixing compliments for the steps of hue.  In the future I'll recreate this demonstration from the more accurate visual primaries (RGB+CMY) as well.
---------------------------------------------

View my portfolio at: www.spencerhallam.com

Friday, September 17, 2010

An Artist's Challenge: A Color Theory Exercise

A Color Theory Exercise: Colored Cubes in Warm and Cool Light


Above is a demonstration of the effects of warm and cool light on cubes of primary and secondary colors.  I created this a few months ago after some intensive color theory study of my own.  I created one cube in Photoshop then copied and pasted it rows of 8 across.  I selected the proper color for each plane of the cube to depict the accurate color in either warm or cool light and filled each side.  The idea was to put any reference aside and try to predict how the colors would behave.  After more study and advice I intend to adjust the colors as I begin to see mistakes.

This is a challenging exercise I'd recommend for any professional artist and/or student with Photoshop savvy to create their own version.  I'll post the basic cube so you can do it yourself. It's like a Rubik's cube for artists!

Also, if you're a more experienced professional than I, please comment below and tell me how I could improve my color relationships with a short critique.

-Are the relative values correct?
-Is the background color hindering or strengthening the effect?
-Do the warm and cool versions of each cube seem like they are identical aside from the relative warmth of their lighting?

Here's the scrambled cube if you'd like to test or improve your skills:

Good luck!

-------------------------------------
View my portfolio at: www.spencerhallam.com

Friday, September 10, 2010

An 8"x10" oil study in 45 minutes

This is a quick study was done from some photo reference.  If I remember this one was completed in about 45 minutes some studies are finished in half that time. Paintings done this way can end up with a "flying by the seat of your pants" unfinished aesthetic.  This one fortunately turned out to be a surprisingly nice little painting.


-------------------------------------
View my portfolio at: www.spencerhallam.com

Tuesday, August 24, 2010

A Modern Psychopomp

A psychopomp is the name for a mythological spirit guide that escorts souls to the after life.   Similar characters exist in many mythologies.  In the ancient Greek tradition Charon would accept coins placed in the mouths of the dead as fare to ferry their souls across the river Styx and Acheron.

Here I've depicted Charon as a bus driver.  I thought it might be funny to interpret the Purgatory as attempting to maintain an updated transit system (and failing at it).  As though it was good to keep every thing somewhat familiar to the dead souls it services.

The page is drawn with graphite on paper then digitally colored after it has been scanned.

For more on Psychopomps and Charon:

http://en.wikipedia.org/wiki/Psychopomp

http://en.wikipedia.org/wiki/Charon_%28mythology%29


-------------------------------------
View my portfolio at: www.spencerhallam.com

One of those Days

A single panel excerpt from "Transit" an in progress graphic novel I've been illustrating about a business man trapped in purgatory.  I thought this landscape was nicely atmospheric.

Monday, May 31, 2010

Hound's Tooth


I've been showing so much work with watermedia in the Sketchbook I wanted to post some work in oils.  So in spite of the uneven sheen on the underside of her ha I decided to post this study. This is a portrait of my friend Marjorie who was gracious enough to pose for me in her hound's tooth coat and vintage hat.  Though she was distracted by an episode of Desperate Housewives playing on the TV during our photo-shoot I was still able to get some classic looking photo reference to paint a satisfying study.